Wrkflow Designer
The Wrkflow Designer is where you design a Wrkflow: add Wrk Actions, connect them on the canvas, define launch inputs, and configure each step before you save and launch.
Open the Wrkflow Designer from Wrkflow Automation by choosing Create Wrkflow, or open a Launch's Launch Console and select Edit in designer.
The Wrkflow Designer layout
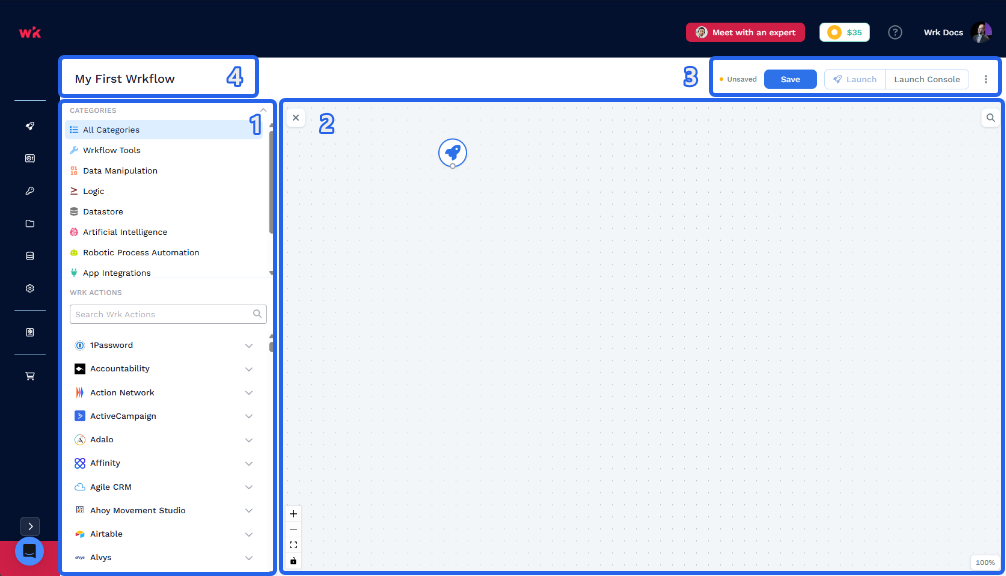
The Designer has four regions you use on every Wrkflow:
- Wrk Action library on the left — browse categories, search, and drag Wrk Actions onto the canvas.
- Canvas in the center — arrange cards and connect them into a flow. Every Wrkflow starts with the launch rocket.
- Toolbar at the top right — Save, Launch, and Launch Console.
- Wrkflow name in the top left — click to rename. The name appears in the Wrkflow list, Launch history, and API calls. Select Save so the change persists.
Browse and add Wrk Actions
Use Categories and Wrk Action search together to find the step you need:
- Select a Category
- Search or scroll the Wrk Action list, then drag a Wrk Action onto the canvas below the launch rocket.
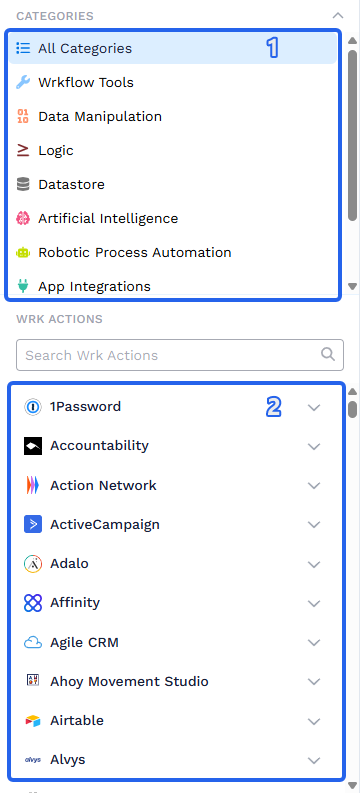
Search accepts partial matches: an app name such as Slack, a section such as API, or a Wrk Action name such as Perform an API call. See Choosing a Wrk Action for category overviews.
Set up Launch Configuration
Every Wrkflow canvas starts with the launch rocket. It is the entry point of the Wrkflow, not a Wrk Action card. Launch Configuration defines what the Wrkflow needs each time it starts:
- Select the launch rocket on the canvas to open Launch Configuration on the right.
- Under Launch Inputs, select Add field for each value the Wrkflow should collect at launch time.
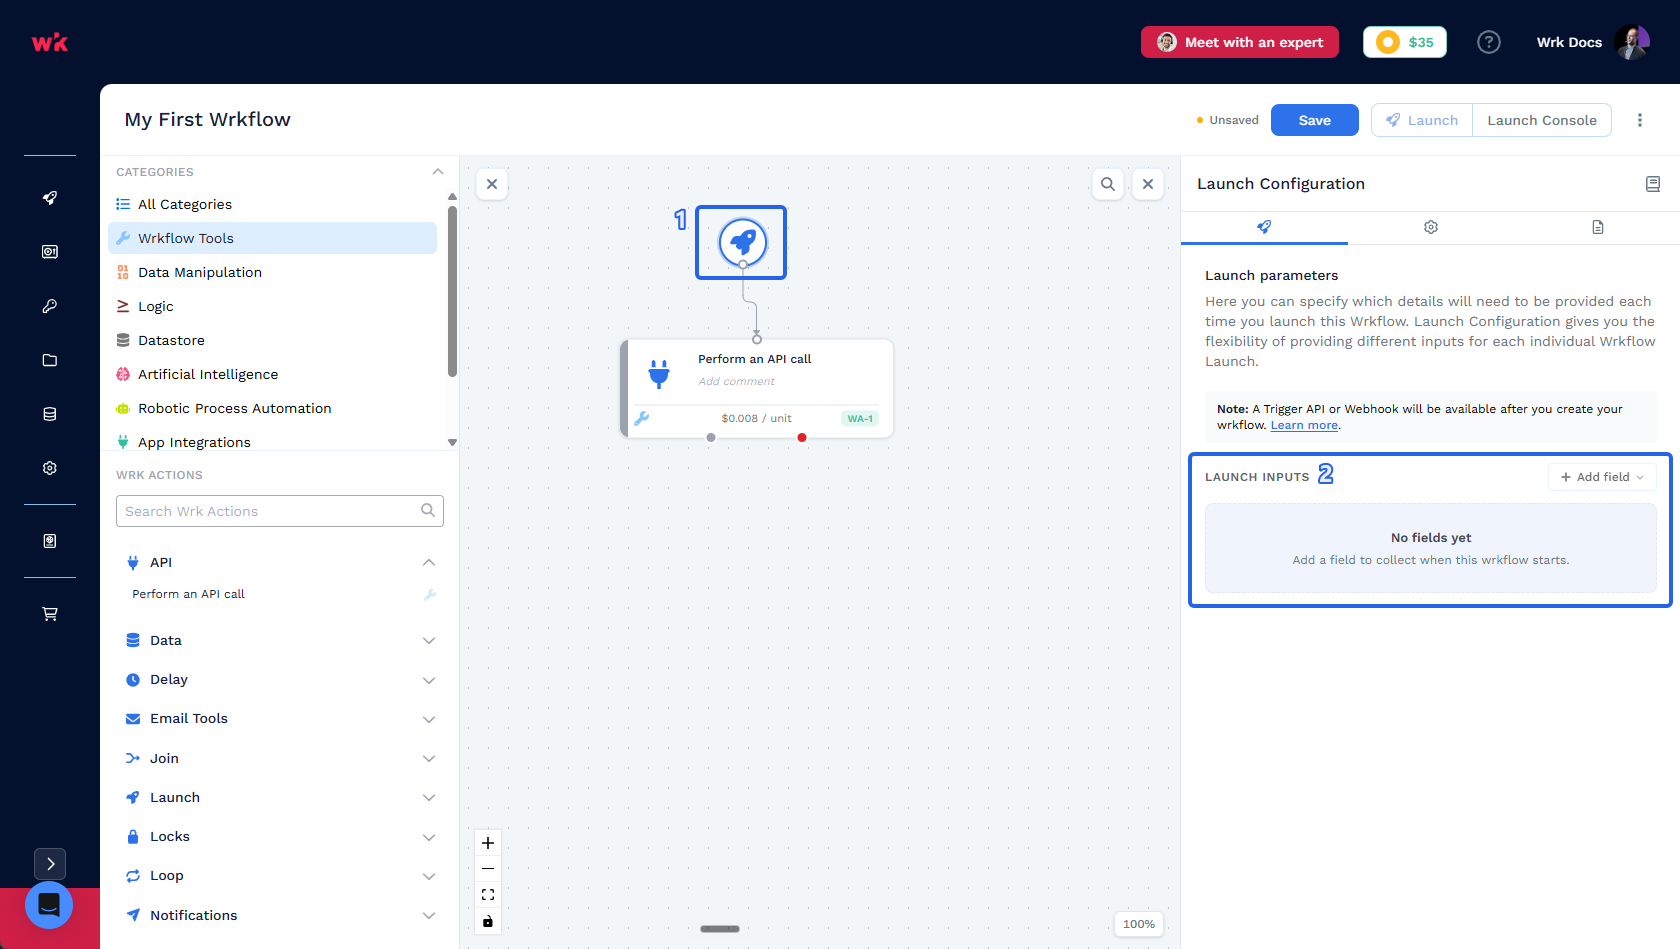
In Launch Configuration you can also:
- Set default values so common inputs are pre-filled on every Launch
- Add short and long descriptions that document what the Wrkflow does for your team and for integrations such as Wrk's MCP server
Select Confirm in the panel to save launch input changes.
Configure a Wrk Action
After you add a Wrk Action to the canvas, click its card to open the configuration panel on the right:
- Wrk Action card on the canvas: select it to open configuration.
- Editable Wrk Action name: changes appear on the canvas and in the Debug Console.
- View documentation: open the reference docs for that Wrk Action or application.
- Comment: add a note that documents why the step exists or how it is configured.
- Wrk Action configuration: fill in Required and Optional inputs, and define Custom Outputs when you need named values for downstream steps. Bind values from launch inputs or earlier Wrk Actions using the Data Library.
- Confirm and Test: Confirm saves changes to the Wrk Action. Test opens Wrk Action Testing.
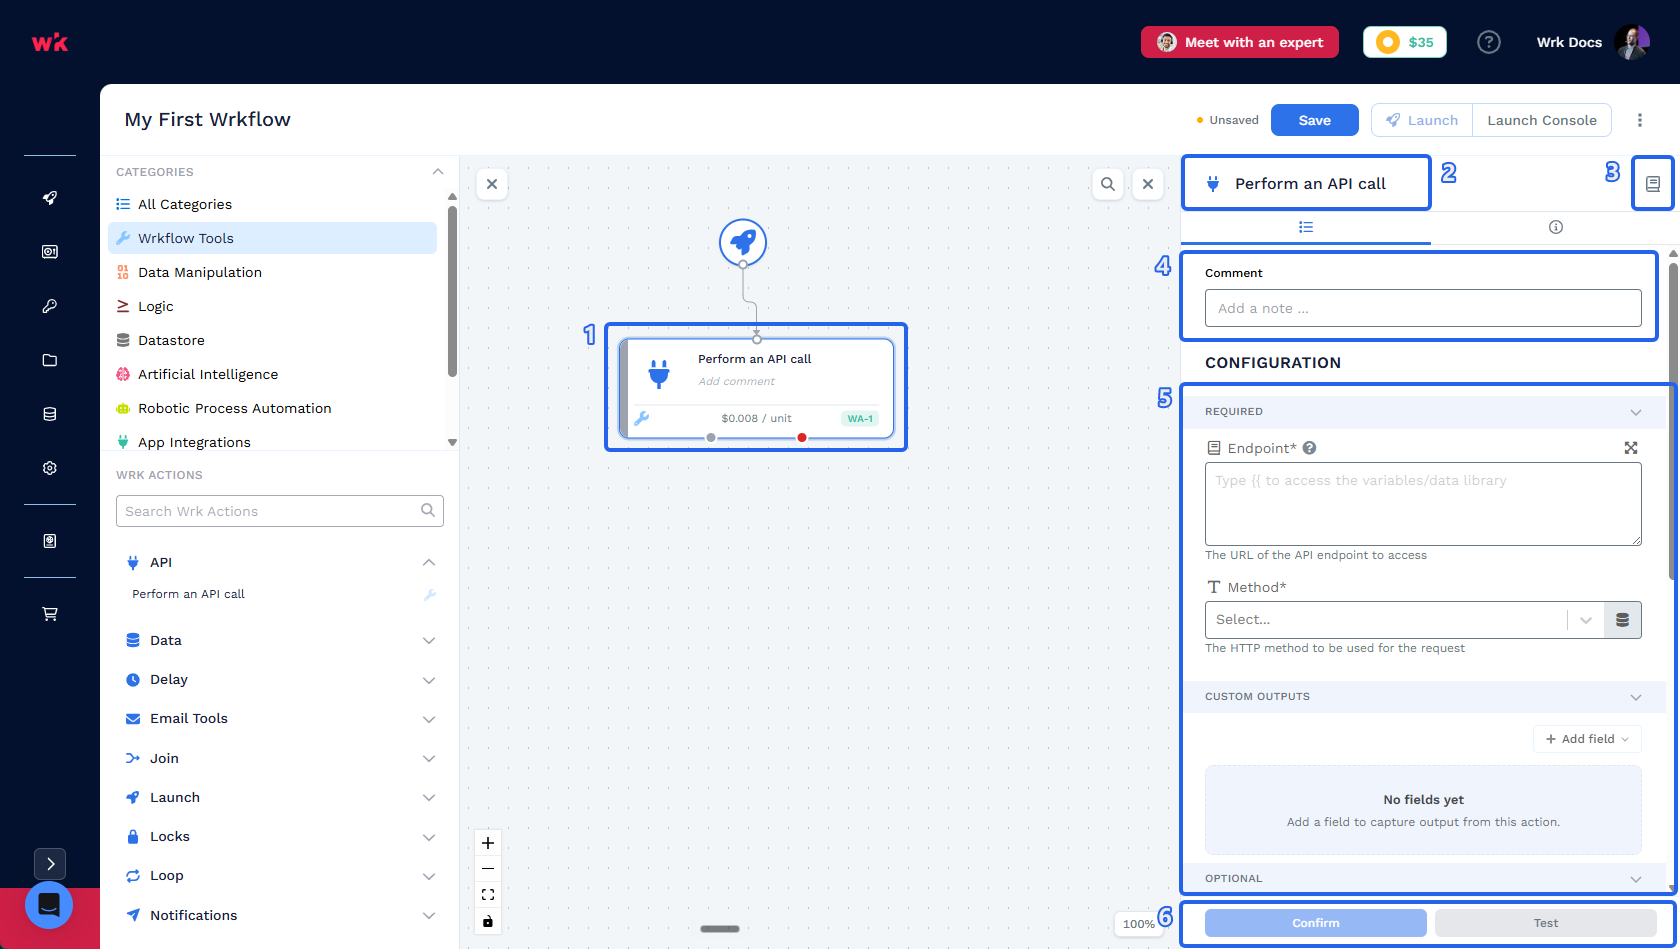
If you click away without confirming, your edits are lost.
Review inputs, outputs, and cost
Open the info tab on the configuration panel to read what the Wrk Action does, which inputs it expects, what it outputs, and the per-unit cost without editing fields.
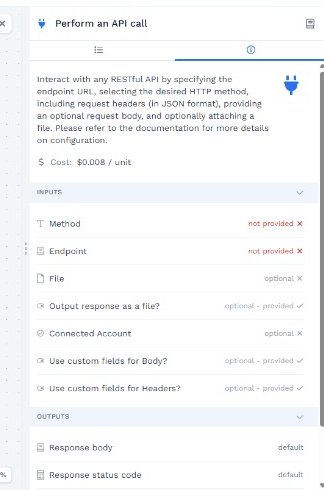
Use this view when you need field names, output shapes, or pricing before you configure the step.