Webhook Launch
A webhook launch starts a Wrkflow when an external system calls a URL. You generate the URL in Launch Control, paste it into whichever application you want to trigger from, and every call to that URL creates a new Launch.
Webhook launch suits event-driven work: a form submission, a new record in a CRM, a payment notification, or any third-party app that can call a URL when something happens.
Open Webhook Launch
On the Wrkflow Automation screen, find your Wrkflow and select the webhook icon, the fourth option in the Launch Control column.
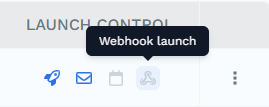
This opens the Launch Control panel with Webhook Launch selected.
Generate the webhook URL
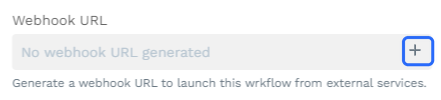
A Wrkflow that has never used a webhook starts with No webhook URL generated. Select the + button to create one.
The panel then shows a Webhook ID, an Async Webhook URL, a Sync Webhook URL, and a Priority dropdown.
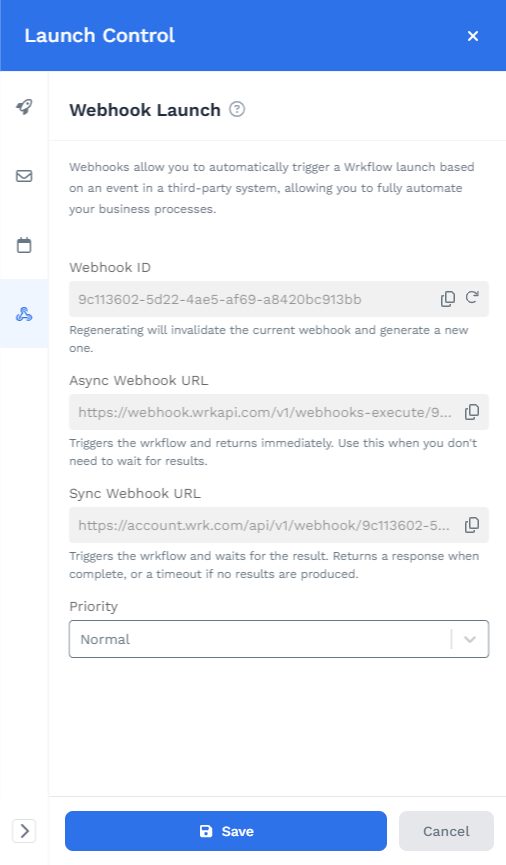
| Field | What it does |
|---|---|
| Webhook ID | The identifier both URLs are built from. Regenerating it invalidates the current webhook immediately |
| Async Webhook URL | Starts the Wrkflow and returns straight away |
| Sync Webhook URL | Starts the Wrkflow and waits for it to send a response back |
| Priority | How the jobs from this Wrkflow are ranked against all other jobs on the platform |
Priority decides how the jobs from this Wrkflow are treated against every other job running on the platform, and it changes what each Launch costs. Choose High to have this work jump ahead of other jobs at the cost of more credits. Choose Low to let it sit behind other work and pay fewer credits, which suits anything that is not time-sensitive.
Copy the URL you need with the copy icon beside it, then select Save.
Regenerating the Webhook ID invalidates the existing URLs. Any external system still calling the old URL stops triggering the Wrkflow, so update those systems before or immediately after regenerating.
Async webhook
The async webhook is the option most builders use. Paste the Async Webhook URL into any application that lets you configure a webhook, and a POST or GET call to that URL starts your Wrkflow. Wrk returns 200 right away without waiting for the Wrkflow to finish, so the calling system is never held up.
Receive the incoming payload
The webhook can only hand the payload to launch parameters that already exist. To capture the data sent with the call, open the Wrkflow in the Wrkflow Designer and:
- Select the rocket node at the top of the Wrkflow to open the Launch Configuration panel.
- Under Launch Inputs, select Add field and add these three parameters yourself, each with the text long type so it can hold a full payload:
body,headers, andparams.
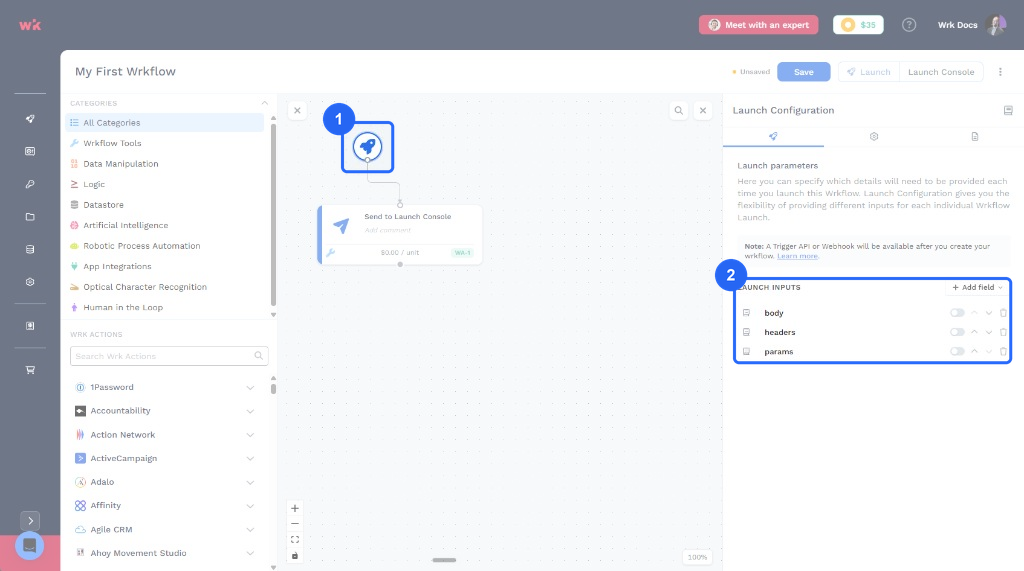
Then save the Wrkflow.
If you skip this step, the payload has nowhere to land and the Launch starts with no input data. On every webhook Launch, Wrk populates those fields with the request body, headers, and query parameters, and downstream Wrk Actions can bind to them through the Data Library.
Sync webhook
The sync webhook works the same way, except the caller waits. Wrk holds the connection open until your Wrkflow sends something back, then returns that as the response body. If nothing is sent back before the timeout, the caller receives a timeout instead.
Your Wrkflow needs a Wrk Action to produce that response. In the Wrkflow Designer:
- Select the Wrkflow Tools category in the Wrk Actions list.
- Drag Respond to Wrkflow Sync API onto the Wrkflow.
- Configure the Wrk Action in the panel on the right, then select Confirm.
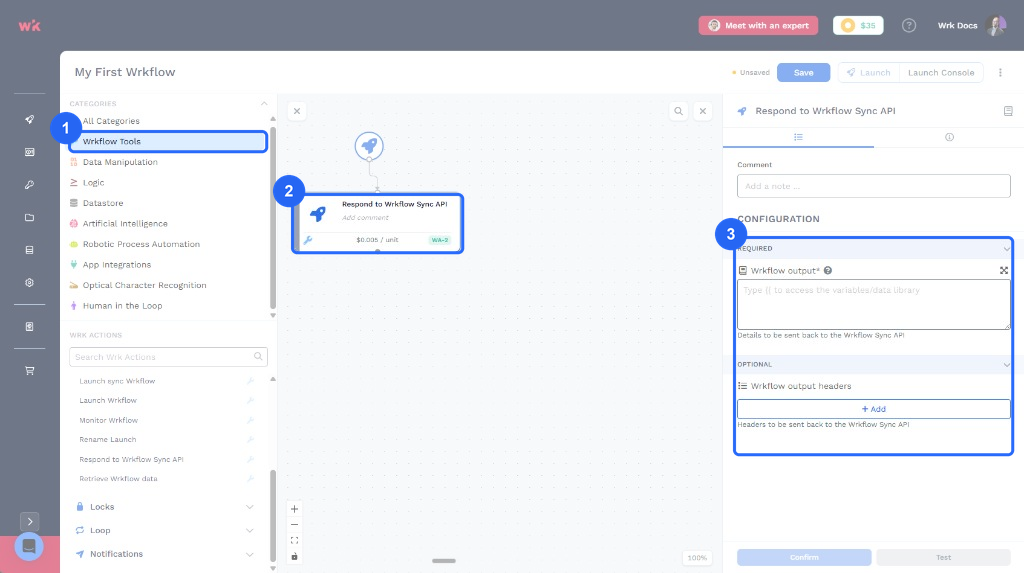
| Field | What it does |
|---|---|
| Wrkflow output | Required. The details sent back to the Wrkflow Sync API as the body |
| Wrkflow output headers | Optional. Headers sent back alongside the body |
Whatever you send to the Sync API is exactly what the caller receives as the webhook response. Type {{ in Wrkflow output to pull in variables from the Data Library, so the response can carry results the Wrkflow produced.
Respond to Wrkflow Sync API covers both synchronous entry points. The same Wrk Action returns the response whether the Wrkflow was started by a sync webhook or by a call to the Sync API, so a Wrkflow that already has it configured works for either.
Which one to use
| Use the async webhook when | Use the sync webhook when |
|---|---|
| The caller only needs confirmation the Launch began | The caller needs data back from the Wrkflow |
| The Wrkflow is long-running or human-in-the-loop | The Wrkflow completes quickly and always returns a response |